
 HELICAL
Helical Instructions / Calf Registration
How to Register a Calf via Helical
This guide explains how to register a calf in Helical, from choosing the registration template to reviewing and submitting the details.
Before You Start
Make sure you have the following ready before logging in:
- Your Helical login details and access to the relevant member or account
- The calf's tag number, date of birth and individual name
- The dam and sire tag numbers or name, and any other applicable registration information
Step 1
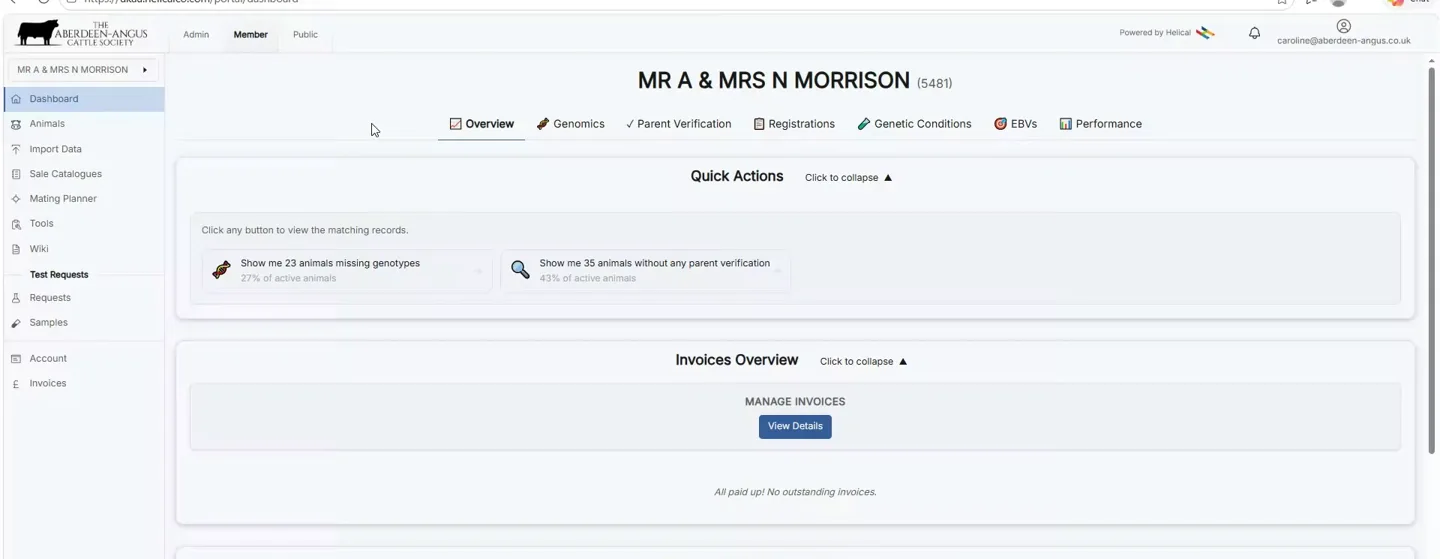
Start in your member account
- Open Helical and select the correct member or account.
- Select Import Data from the left-hand menu.
Step 2
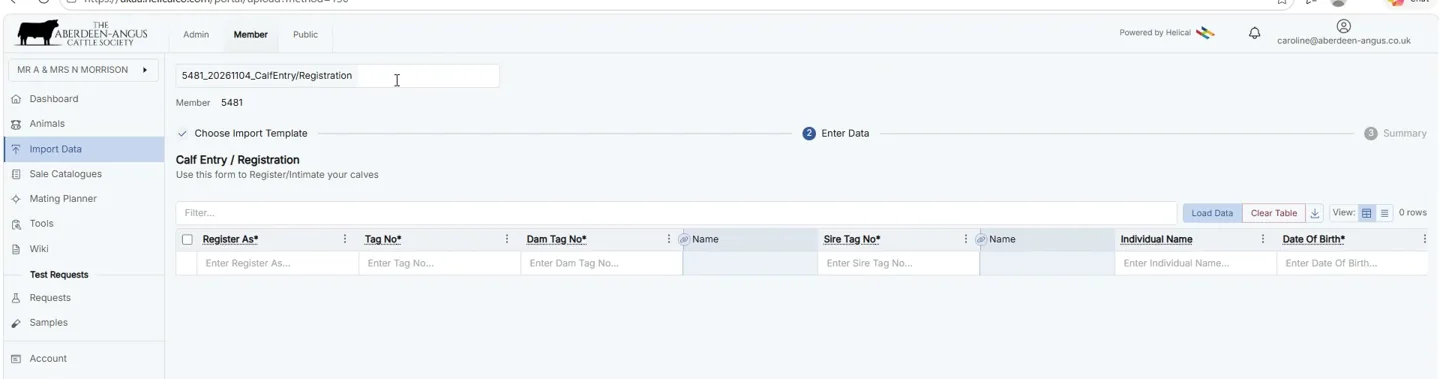
Choose the registration form
- Select the Calf Entry / Registration import template.
- On the Enter Data screen, check the member and give the import a recognisable name if needed.
Step 3
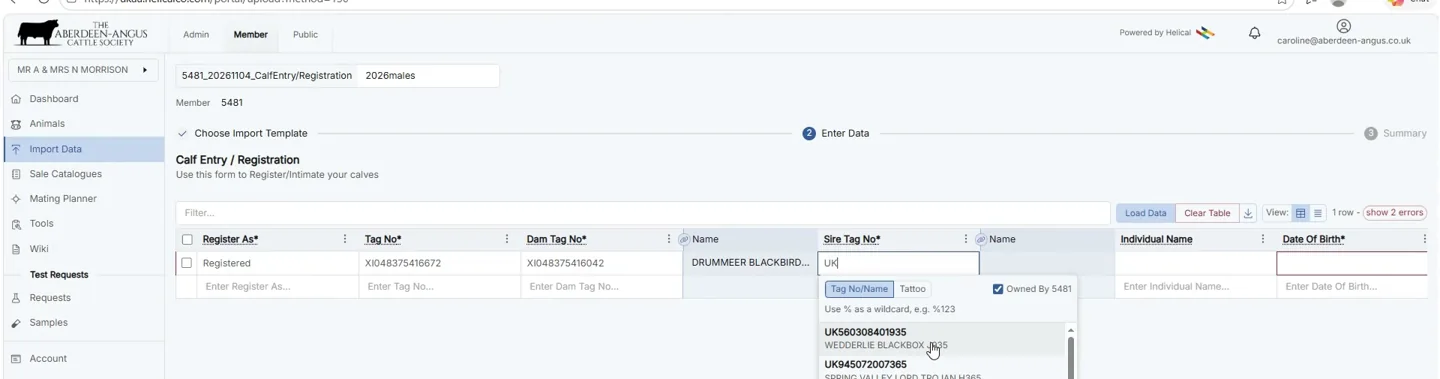
Enter the calf and its parents
- In Register As, choose Registered for a full registration, or Intimation for an Intimation.
- Enter the calf Tag No and Dam Tag No; select the matching dam where a lookup is offered.
- Enter Sire Tag No and choose the matching sire from the search results.
Step 4
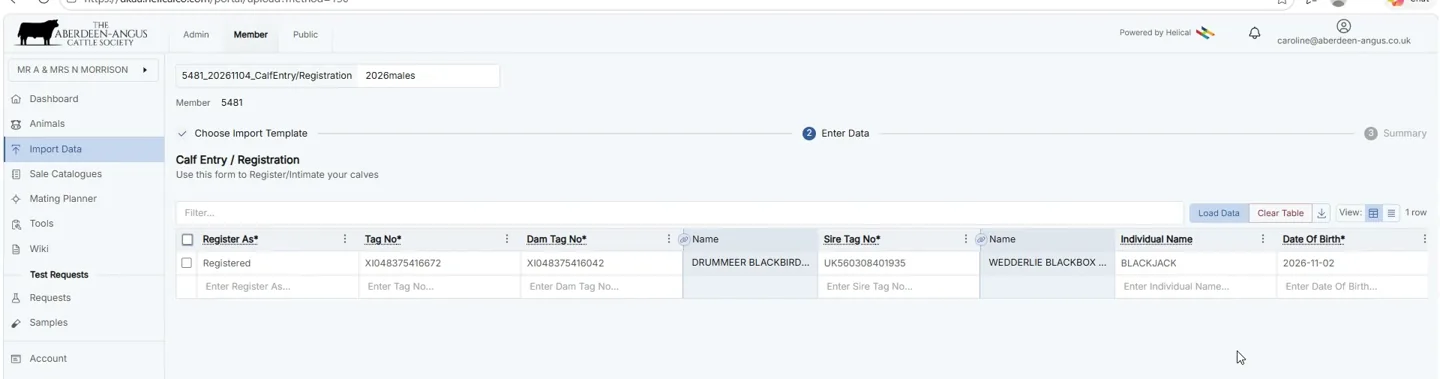
Complete the calf details
- Enter Individual Name, Date Of Birth and Sex of the calf. Use the calendar or type the date in the accepted format.
- Scroll horizontally to complete further registration detail fields such as Birth Weight and Calving Ease. A red outline or error count indicates missing or invalid information.
Step 5
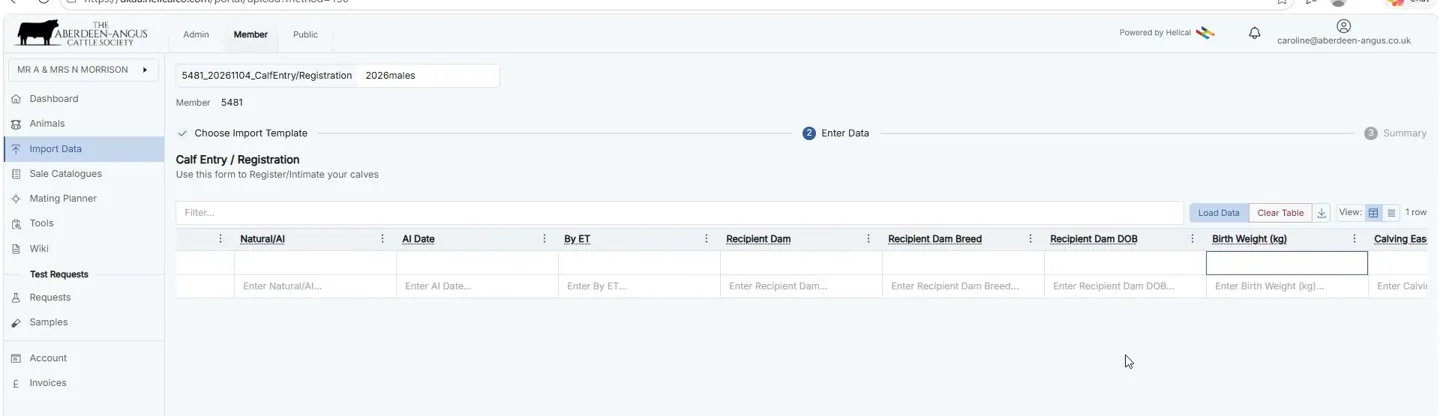
Review remaining columns
- Use the horizontal scroll bar to inspect additional fields and complete any that apply to this calf.
- Examples shown include Natural/AI, AI Date, By ET, Recipient Dam. Leave non-applicable optional fields blank.
Step 6
Review and submit
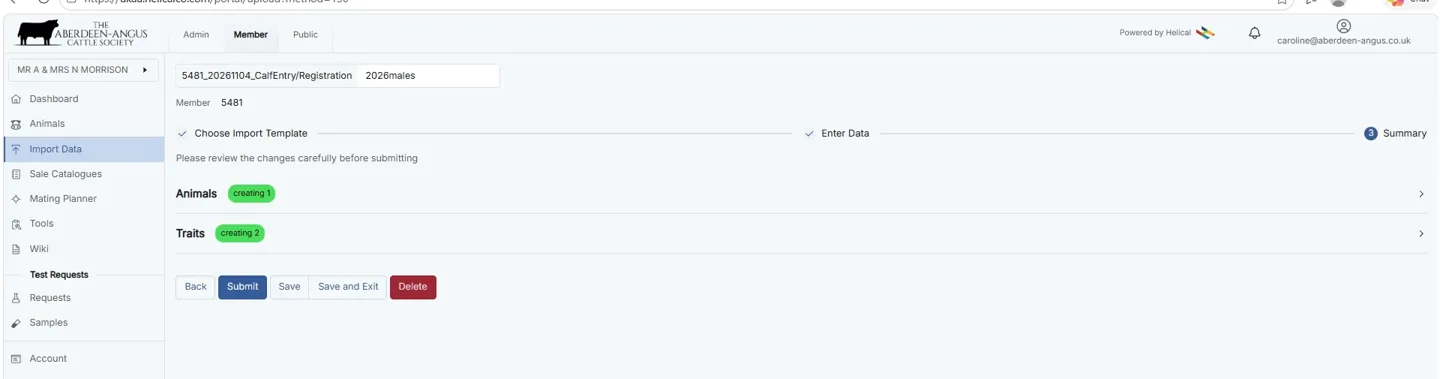
- When the row is complete and any errors have been resolved, select Next to open Summary.
- Review the listed animals carefully. Select Back if corrections are needed.
- Select Submit to send the registration. Save or Save and Exit does not submit it.
Need Help?
Telephone: 01738 622477
Email: registrations@aberdeen-angus.co.uk
Website: www.aberdeen-angus.co.uk